Monday, June 23, 2008

Carbonation Lid

So throughout my beer brewing career, I have had the worst luck with carbonation. So, for whatever reason, my last two batches, I have basically struck out trying to carbonate them, so i just gave up and bought a carbonation lid (pictured below):


Well, i just carbonated my first beer with this apparatus, and I must say it is the coolest thing I have ever used, and it works wonders. I will post pictures of my two beers (Honey Wheat and American Light Beer) later tonight.

Thursday, May 22, 2008

Beer to secondary

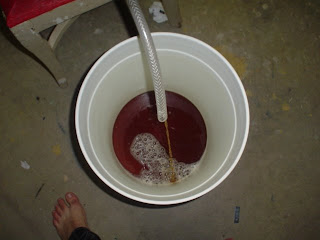
So I transfered my 15 gallons of beer to three secondaries using my Auto-siphon for the first time. When i first bought this, i thought it may have been a waste of money, but it was the only siphon tube at my LHBS that would reach to the bottom of my 10 gallon fermenter, but i'll tell you what, this was great. It was nice for starting siphons and also for pumping out the last bit of usable liquid from the bottom of a bucket.

Here are the three brews. From left to right, Honey Wheat normal, Vinny Lite, and Honey Wheat dry hopped:

Close up of the normal honey wheat:

Close up of the vinny lite, seems i missed the 5 gallon mark, it looks more like 4.5 gallons but whatever. Also it is significantly lighter than that picture shows, beers always looker darker than they actually are when in the carboys:


Dry hopped honey wheat, it has 1 oz of hole leaf Cascade hops. I chose them because they have a citrusy flavor and I was hoping that would work well with the honey and the wheat. All in all this is just a random experiment that i hope makes something that is atleast drinkable:

New Equipment

So you could see some of my newer equipment in my brewday photos, but I figured I could give you a better look at my new toys.

These next two images are of my new keggle (brew pot made out of a keg), I have 2 of them, one for a hot liquor tank and one for a boil kettle. I had all the steel work done at a professional shop where they cut off the top and rounded the edge and welded 3 1/2"Stainless steel NPT couplings onto it. One is used for the ball valve, one is used for the Thermometer (purchased off ebay) and one is used for the sight glass (http://www.ihomebrewsolutions.com). I was able to get a 16"x16" turkey fryer which this fits on. Also the thermometer is low enough for 5 gallon batches and the sight glass kind of works for 5 gallon batches:


So, here is the top down view. As you can see there is a copper tube in there. Since the keggles bottom is rounded and the ball valve is placed about 1 inch above the bottom, you need a tube (in this case a copper tube) that goes from the ball valve coupling to the bottom, and when you start a siphon by draining it, it will clear all but a tiny bit of liquid from bottom:


Here is my new mash tun. This will be used primarily for 10 gallon batches but it can be used for 5 gallon batches (i'd rather use my smaller mash tun just so i have less air space in the tun). In the top right there is a nipple so you can draw the fluid into the manifold at the top. Also on the top right corner you see a hole, this is a work in progress for a panel mounted thermometer i have, so i can mount it there and monitor mash temps.


Here is the manifold on the inside and the false bottom manifold. Both seemed to work well the first time i brewed with it. The one on the top has small holes drilled into it so the water gently pours on top of the grain bail, and the one on the bottom has thin slits on the bottom so it drains the liquid and leaves the grist behind.

Saturday, May 17, 2008

Kegerator

So, if you didn't notice I hate bottling, i found it the most painful part of brewing, so i moved onto kegging. In order to keg, you need something to store the kegs...so my solution, i converted a chest freezer into a kegerator.

Here is an example of the fridge i started with to make the kegerator:

I painted it black and added a wooden collar so I don't have to drill through the fridge:

Here is the kegerator in the final place...

Also my one friend who lives in Kentucky just started a blog for his brewing adventures, check it out at http://bigbearbrewery.blogspot.com/

Christmas Beer

I brewed this beer a while ago and I just found the pictures laying around on my camera so i figure i'd fill you in. Basically this beer was a simple christmas beer, i can't remember what the recipe was but here are pictures anyways.


Here is a picture of the grain bail in my small mash tun. I used the strainer so when I drained water into the mash it would distribute evenly. I tried to do this brew fly sparging, which means you just run the water slowly into the mash and just let it flow out right away rather than letting it sit in there for an hour like in batch sparging. Overall it went rather well and i got pretty good efficiency i believe


Yeah, so this fly sparging. I put hot water into one bucket, then siphoned it down to the mash and drained into another bucket, then put it into the boil kettle...


Here is another shot of the wort coming out....


Here is the wort after it has all been cooked and such... It is cooling here.


Yeah, i don't have any other pictures of this beer, but it came out really well. I added cherries to the secondary fermentation and it came out really well and not too sweet. I am looking forward to making this beer again

Monday, May 12, 2008

First brew day in a while

Sorry for the long delay in posts...i brewed once or twice since i posted last but nothing major.

So since I've last posted, i don't live at 1055 anymore, but i don't really feel like setting up another blog so i will continue here. Also my new brew partner and myself (my old one decided to become a homosexual and move to California so he could meet a nice man, fall in love, and get a civil union, or whatever those crazy kids call it nowadays, if you are reading this, Hi Jon...), have kind of been upping our equipment. We now have two keggles, which are kegs turned into pots equipped with ball valves at the bottom (sure beats siphons), thermometers for monitoring temperatures, and sight glasses for monitoring liquid levels. Since my other wort chiller was kind of a hack throw together thing, i also built a bigger one, which nicely chilled 10 gallons of boiling wort down to pitching temps in a little over 20 min...

Another nice thing is we are doing our brewing using propane now (since i moved out were doing brewing using an electric turkey fryer, which was a pain in the ass cause it took too god damn long).

Also, we made a larger mash tun which will enable us to do larger batches (10 gallons), so that was a big improvement. And finally the biggest improvement of all to our brewing efforts:
Yes, a magnetic drive pump. It is the most amazing thing ever, tell gravity to take a hike, we are in a whole new world now.

Ok so moving on, we did a double brew day last weekend, we did 10 gallons of a recipe i posted on here a couple of months ago of the Honey Wheat. Also i experimented with an idea i got from another guy i know of trying to make an American Light Beer clone (Miller Lite, Coors Lite, Bud Lite, Natural Lite etc...). Here are the Recipes...

Honey Wheat #2:
Size 10 Gallons
Yeast: WLP001 California Ale Yeast

10lbs: Wheat Malt
10lbs: American 2-Row
5lbs: American Crystal 10L
6lbs: Honey
2oz: Crystal Hops
2oz: Tettnanger hops


Vinny Lite:
Size 5 Gallons
Yeast: WLP008 East Coast Ale Yeast

5lbs American 2-Row
1lbs American Crystal 10L
4 cups Cooked Rice
1 oz Cascade Hops

Here are some pictures, which were all taken during the honey wheat brewing:

Our Grain bail for the honey wheat beer...

Moving water from HLT (right) to mash tun (left):

Stirring the mash:

The boil:

Well, that's it for now, since it's the summer, i do hope to brew more often, so i will try and keep all 3 of you who actually read this posted...