Sunday, January 9, 2011

Home Brew DIY and Save Money: Or how i learned to stop giving micromatic money and just be creative

Long time no post.... Anyways, I figured I would post this so the overloards at google can log it and hopefully I can help some other poor soul out there save some cash...

Anyways, yesterday I decided that my Draft Lines needed replacing and the tower pieces were due for some much needed maintenance... Well, sadly the lines were attached to the nipples (heh) with ear clamps, which if you have ever worked with, you will understand why they are the bane of my brewing existence... Anyways, this means I had to take everything apart, which is fine cause I really needed to clean everything...

The next step was really frustrating... if you have ever seen inside a draft tower, it looks like this (note this is not my image, but one I found online because my draft tower is not currently put together)


Anyways, after about 40 min of futzing with several types of wrenches and pliars, I gave up, and decided to consult the great oracle that is google. After about 5 min I figured out that there was a special tool that could be used to aid in these efforts called a tower shank wrench... Problem was that it would cost me around 40 bucks to get it shipped! Now... Look at this image more closely and tell me what you see...


Well... If you saw what I saw, you saw a normal 1 1/16 Box end wrench with a small notch cut out of the side... Anyways this could be purchased at Micromatic for 38.50 + shipping...

Being the grad student, I really didn't feel like shelling out 45-50 bucks to pay for this bullshit, so I figured to myself, there had to be a better way...

Anyways, I drove down to ollies bargain outlet (the greatest store ever), got myself a 1 1/16 combination wrench for 7 bucks, took it home, spent about 15 min with the dremmel and cut a hole out of it, and BAM... had my shanks off in about 5 min...

Here is a final picture for reference...

Anyways.... This just goes to show you how retailers just rip you off by making you pay premium for things that if you put a little effort and elbow grease into you can do yourself. I find this especially true about the homebrewing world. Things like pre assembeled mash tuns, prewired temp controllers, have almost a 50% markup...

So remember, think before you buy

Saturday, March 21, 2009

My new baby...


I recently moved into an apartment, so i don't hvae my old big kegerator. I knew i couldn't get one of the big ones like I used to have, so I decided that I wanted something that took up a relatively small footprint, but could still hold 3 kegs...

First I looked at using a commercial kegerator, since some of them can hold 3 cornies... After looking into that, I decided they were too expensive, would ahve costed me a minimum of 600 bucks...

Eventually i stumbled across the Holiday 5.3 cu ft kegerator, which held 3 cornies, for 180 at lowes (pictured below)...


Anyways, I bought that... Then I decided that since I was only gonna have 3 taps, that rather than build another collar, I could just buy a tower, and make it look significantly nicer... So I had the opportunity to buy a 3 tower tap on the cheap and jumped at it... Pictured below...


I didn't take any pictures of me putting it together, but it was fairly simple, i cut holes through the top, then since it was alittle wobbly, i cut away the insulation under it and mounted a piece of wood and i replaced the screws that came with it with flat bottomed metal screws and fastened it to the bottom of the wood real tight... Now it don't shake at all... Anyways, here are the pictures


That is a steelers magnet i figure would make it look alittle more sporty... I still need to wire the temp controller but that will take me 10 min...

Monday, June 23, 2008

Carbonation Lid

So throughout my beer brewing career, I have had the worst luck with carbonation. So, for whatever reason, my last two batches, I have basically struck out trying to carbonate them, so i just gave up and bought a carbonation lid (pictured below):


Well, i just carbonated my first beer with this apparatus, and I must say it is the coolest thing I have ever used, and it works wonders. I will post pictures of my two beers (Honey Wheat and American Light Beer) later tonight.

Thursday, May 22, 2008

Beer to secondary

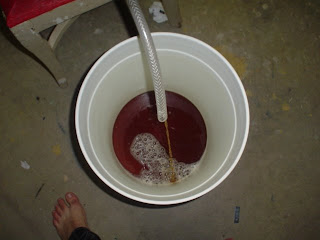
So I transfered my 15 gallons of beer to three secondaries using my Auto-siphon for the first time. When i first bought this, i thought it may have been a waste of money, but it was the only siphon tube at my LHBS that would reach to the bottom of my 10 gallon fermenter, but i'll tell you what, this was great. It was nice for starting siphons and also for pumping out the last bit of usable liquid from the bottom of a bucket.

Here are the three brews. From left to right, Honey Wheat normal, Vinny Lite, and Honey Wheat dry hopped:

Close up of the normal honey wheat:

Close up of the vinny lite, seems i missed the 5 gallon mark, it looks more like 4.5 gallons but whatever. Also it is significantly lighter than that picture shows, beers always looker darker than they actually are when in the carboys:


Dry hopped honey wheat, it has 1 oz of hole leaf Cascade hops. I chose them because they have a citrusy flavor and I was hoping that would work well with the honey and the wheat. All in all this is just a random experiment that i hope makes something that is atleast drinkable:

New Equipment

So you could see some of my newer equipment in my brewday photos, but I figured I could give you a better look at my new toys.

These next two images are of my new keggle (brew pot made out of a keg), I have 2 of them, one for a hot liquor tank and one for a boil kettle. I had all the steel work done at a professional shop where they cut off the top and rounded the edge and welded 3 1/2"Stainless steel NPT couplings onto it. One is used for the ball valve, one is used for the Thermometer (purchased off ebay) and one is used for the sight glass (http://www.ihomebrewsolutions.com). I was able to get a 16"x16" turkey fryer which this fits on. Also the thermometer is low enough for 5 gallon batches and the sight glass kind of works for 5 gallon batches:


So, here is the top down view. As you can see there is a copper tube in there. Since the keggles bottom is rounded and the ball valve is placed about 1 inch above the bottom, you need a tube (in this case a copper tube) that goes from the ball valve coupling to the bottom, and when you start a siphon by draining it, it will clear all but a tiny bit of liquid from bottom:


Here is my new mash tun. This will be used primarily for 10 gallon batches but it can be used for 5 gallon batches (i'd rather use my smaller mash tun just so i have less air space in the tun). In the top right there is a nipple so you can draw the fluid into the manifold at the top. Also on the top right corner you see a hole, this is a work in progress for a panel mounted thermometer i have, so i can mount it there and monitor mash temps.


Here is the manifold on the inside and the false bottom manifold. Both seemed to work well the first time i brewed with it. The one on the top has small holes drilled into it so the water gently pours on top of the grain bail, and the one on the bottom has thin slits on the bottom so it drains the liquid and leaves the grist behind.

Saturday, May 17, 2008

Kegerator

So, if you didn't notice I hate bottling, i found it the most painful part of brewing, so i moved onto kegging. In order to keg, you need something to store the kegs...so my solution, i converted a chest freezer into a kegerator.

Here is an example of the fridge i started with to make the kegerator:

I painted it black and added a wooden collar so I don't have to drill through the fridge:

Here is the kegerator in the final place...

Also my one friend who lives in Kentucky just started a blog for his brewing adventures, check it out at http://bigbearbrewery.blogspot.com/

Christmas Beer

I brewed this beer a while ago and I just found the pictures laying around on my camera so i figure i'd fill you in. Basically this beer was a simple christmas beer, i can't remember what the recipe was but here are pictures anyways.


Here is a picture of the grain bail in my small mash tun. I used the strainer so when I drained water into the mash it would distribute evenly. I tried to do this brew fly sparging, which means you just run the water slowly into the mash and just let it flow out right away rather than letting it sit in there for an hour like in batch sparging. Overall it went rather well and i got pretty good efficiency i believe


Yeah, so this fly sparging. I put hot water into one bucket, then siphoned it down to the mash and drained into another bucket, then put it into the boil kettle...


Here is another shot of the wort coming out....


Here is the wort after it has all been cooked and such... It is cooling here.


Yeah, i don't have any other pictures of this beer, but it came out really well. I added cherries to the secondary fermentation and it came out really well and not too sweet. I am looking forward to making this beer again